
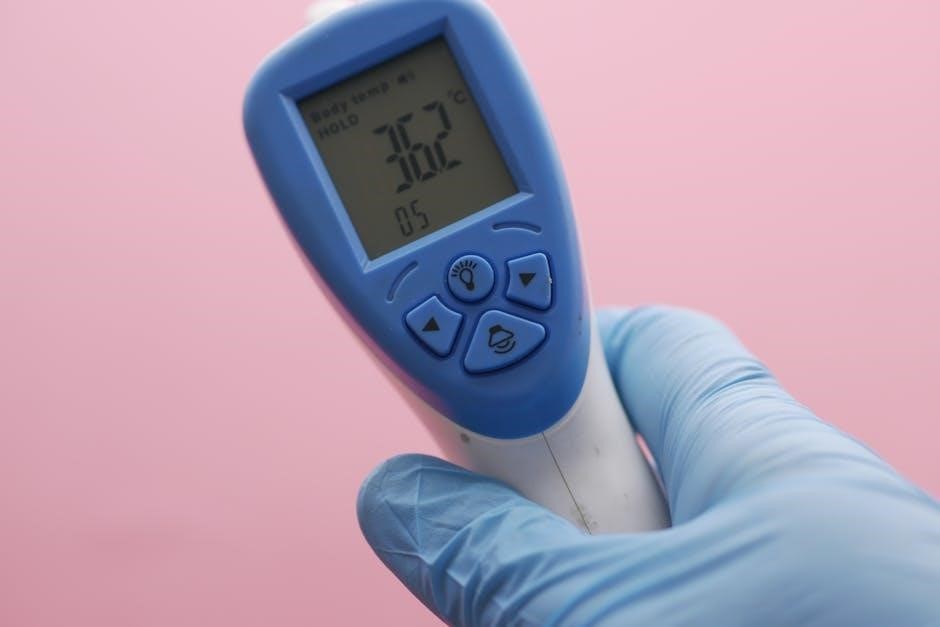
Welcome to the ThermoPro thermometer manual, your essential guide to mastering accurate temperature measurements. Discover setup, calibration, and troubleshooting tips for optimal performance, ensuring precise readings every time.
1.1 Understanding the Importance of the Manual
The ThermoPro thermometer manual is essential for ensuring optimal performance and accuracy. It provides detailed instructions for setup, calibration, and troubleshooting, helping users achieve precise temperature readings. Understanding the manual enables proper use of features like synchronization, wireless monitoring, and battery maintenance. It also highlights safety guidelines and warranty information, ensuring longevity and reliability of the device. By following the manual, users can maximize their thermometer’s capabilities, whether for cooking, BBQ, or environmental monitoring. This guide is your key to unlocking all the functions and benefits of your ThermoPro thermometer, ensuring accurate and reliable results every time.
1.2 Overview of Thermopro Thermometer Models
ThermoPro offers a range of thermometer models designed for precision and versatility. The TP510, TP01H, TP19, and TP-17 are popular choices, each tailored for specific needs. These models feature advanced functions like wireless monitoring, humidity tracking, and multiple probe capabilities. The TP510 excels in BBQ and smoking, while the TP01H is ideal for everyday cooking. The TP19 and TP-17 offer robust designs for both indoor and outdoor use. Understanding these models ensures you select the right tool for your tasks, whether it’s precise temperature control or monitoring environmental conditions. This manual provides comprehensive guidance for each model, helping you maximize their potential.
Thermopro Thermometer Models and Their Manuals
ThermoPro offers various thermometer models, each with a dedicated manual. Models like TP510, TP01H, TP19, and TP-17 provide detailed instructions for setup, calibration, and troubleshooting.
2.1 Thermopro TP510 Manual
The ThermoPro TP510 manual provides comprehensive guidance for this popular thermometer model. Available in PDF format, it covers installation, calibration, and troubleshooting. Key sections include setting up wireless monitoring, understanding temperature range limits, and maintaining accuracy. The manual also details button functions, such as the MODE and LOCK/CAL buttons, and explains synchronization processes. Troubleshooting tips address common issues like connectivity problems and inaccurate readings. Users can download the manual directly from ThermoPro’s official website, ensuring access to detailed instructions for optimal performance. This resource is essential for mastering the TP510’s features and ensuring precise temperature measurements in various cooking and monitoring scenarios.
2.2 Thermopro TP01H Manual
The ThermoPro TP01H manual offers detailed instructions for this versatile thermometer. Available in PDF format, it guides users through setup, calibration, and advanced features. Key sections include wireless monitoring configuration, temperature range specifications, and battery installation tips. The manual also explains the functions of the MODE and LOCK/CAL buttons, enabling users to navigate modes and calibrate the device effortlessly. Troubleshooting sections address common issues like connectivity problems and inaccurate readings. By following the manual, users can optimize the TP01H’s performance for precise temperature monitoring in cooking, grilling, and environmental applications, ensuring consistent and reliable results every time.
2.3 Thermopro TP19 Manual
The ThermoPro TP19 manual provides comprehensive guidance for this advanced wireless thermometer. Available in PDF format, it details setup procedures, calibration steps, and feature customization. The manual explains how to use the MODE button for switching between probes and synchronization. Additionally, it covers the LOCK/CAL button’s role in calibration and locking settings. Instructions for installing batteries and troubleshooting common issues are also included. The TP19 manual emphasizes precise temperature monitoring, making it ideal for grilling, smoking, and cooking. By following the manual, users can unlock the full potential of their TP19 thermometer, ensuring accurate readings and seamless functionality in various culinary applications.
2.4 Thermopro TP-17 Manual
The ThermoPro TP-17 manual is a detailed guide for this highly-rated digital meat thermometer. Available in PDF format, it covers installation, calibration, and operation. The manual explains how to use the MODE button for probe selection and synchronization. It also outlines the LOCK/CAL button’s functions for calibration and settings. Instructions for battery installation, troubleshooting, and maintaining accuracy are included. The TP-17 manual highlights features like temperature range monitoring and compatibility with other devices; Users can master precise temperature control for grilling, smoking, and cooking. By following the manual, you can optimize the TP-17’s performance, ensuring flawless results in every culinary endeavor.

Calibration of Thermopro Thermometers
Calibration ensures your Thermopro thermometer delivers precise readings. Follow the manual’s steps to adjust settings using the LOCK/CAL button, guaranteeing accurate measurements for reliable results every time.
3.1 Steps to Calibrate Your Thermopro Thermometer
To calibrate your Thermopro thermometer, start by turning it on and holding the LOCK/CAL button for 5 seconds to enter Calibration Mode. Once the temperature reading begins flashing, press the LOCK/CAL button again to adjust the temperature. Use an ice water bath to ensure accuracy, setting the temperature to 32°F (0°C). Press and hold the MODE button to save the calibration. Repeat the process for other probes if applicable. Regular calibration ensures precise measurements, maintaining the accuracy of your Thermopro thermometer for reliable results in cooking, grilling, or environmental monitoring.
3.2 Importance of Calibration for Accuracy
Calibration is crucial for ensuring your Thermopro thermometer delivers precise and reliable readings. Without proper calibration, temperature measurements may be inaccurate, leading to unsafe food preparation or environmental monitoring errors. Regular calibration ensures consistency and reliability, especially in critical applications like cooking or HVAC systems. Improper calibration can result in overcooked or undercooked food, potentially posing health risks. By maintaining accurate readings, calibration extends the lifespan of your Thermopro thermometer and guarantees optimal performance. Always calibrate before first use and periodically thereafter to maintain trust in your measurements and ensure the best results for your specific needs.
Synchronization and Pairing
Synchronization ensures seamless connectivity between your Thermopro thermometer and paired devices. Press and hold the LOCK/CAL button for 5 seconds to initiate pairing, enabling wireless monitoring and data transfer.
4.1 How to Synchronize Your Thermopro Thermometer
To synchronize your Thermopro thermometer, start by turning on the device. Press and hold the LOCK/CAL button for 5 seconds until the display flashes. This indicates the thermometer has entered synchronization mode. Ensure your receiver or connected device is also in pairing mode. Once connected, the flashing will stop, confirming successful synchronization. For wireless models, follow the same steps and verify connectivity through the app or receiver. Proper synchronization ensures accurate data transmission and seamless monitoring. Refer to your specific model’s manual for additional details if needed.
4.2 Troubleshooting Pairing Issues
If your Thermopro thermometer fails to pair, restart both the device and receiver. Ensure they are within range and no obstacles block the signal. Check battery levels, as low power can disrupt connectivity. Press and hold the LOCK/CAL button for 5 seconds to reset the pairing process. If issues persist, verify that both devices are in pairing mode simultaneously. For wireless models, restart the app or receiver and attempt pairing again. Consult your manual for model-specific instructions, as some devices may require additional steps to re-establish a stable connection.

Battery Installation and Maintenance
Properly install batteries in your Thermopro thermometer to ensure accurate readings. Use high-quality AAA batteries, insert them correctly, and maintain them to prolong device performance and lifespan.
5.1 Steps to Install Batteries in Your Thermopro Thermometer
To install batteries in your Thermopro thermometer, start by ensuring the device is powered off. Locate the battery compartment, typically found on the back or bottom of the unit. Open it by sliding or unscrewing, depending on the model. Insert two high-quality AAA batteries, aligning the positive and negative terminals correctly. Close the compartment securely to avoid moisture or dust interference. Turn on the thermometer to test functionality. Proper battery installation ensures accurate readings and extended device performance. Always use fresh batteries for optimal results, and dispose of used ones responsibly.
5.2 Tips for Extending Battery Life
To extend the battery life of your Thermopro thermometer, follow these practical tips. Always turn off the device when not in use to conserve power. Use high-quality, fresh batteries and avoid mixing old and new ones. Keep the battery compartment clean and dry to prevent corrosion. Store the thermometer in a cool, dry place when not in use to avoid extreme temperatures that can drain batteries. Additionally, avoid leaving batteries in the device for extended periods without use, as this can reduce their lifespan. By following these care tips, you can ensure your Thermopro thermometer operates efficiently for a longer period.
Functional Buttons and Modes
Explore the functions of the MODE, LOCK/CAL, and navigation buttons. Learn to switch probes, set timers, and sync devices efficiently for precise temperature control.
6.1 Understanding the MODE Button
The MODE button is a key feature of your Thermopro thermometer, enabling you to switch between different operational modes. Pressing the button allows you to select between Probe 1, Probe 2, or Timer mode, depending on your needs. A short press cycles through these options, while a long press (2 seconds) enters Synchronization mode, essential for pairing with additional devices. Understanding the MODE button is crucial for maximizing your thermometer’s functionality, whether you’re monitoring multiple probes or setting timers for precise cooking. This versatility ensures you can adapt the device to various cooking scenarios, from grilling to oven roasting, with ease and accuracy.
6.2 Using the LOCK/CAL Button
The LOCK/CAL button is essential for maintaining accuracy and customizing your Thermopro thermometer’s settings. To enter Calibration Mode, press and hold the LOCK/CAL button for 5 seconds until the temperature reading flashes. This allows you to adjust the thermometer to ensure precise measurements. Once calibrated, press the button again to lock the settings, preventing accidental changes. Additionally, the LOCK function helps maintain stable readings during cooking or monitoring. Regular calibration is vital for long-term accuracy, and the LOCK/CAL button makes this process straightforward. Proper use of this button ensures your thermometer remains reliable and delivers consistent results in various cooking or environmental monitoring scenarios.
6.3 Navigating Through Different Modes
Navigating through the Thermopro thermometer’s modes is simple and intuitive. Use the MODE button to switch between Probe 1, Probe 2, and Timer mode. Press the button to cycle through these options, ensuring you can monitor multiple temperatures or set a cooking timer. For synchronization, press and hold the MODE button for 2 seconds. This feature allows seamless connectivity with paired devices. The thermometer also offers a range of modes, including cooking, monitoring, and synchronization, catering to different needs. Regularly checking and switching modes ensures precise temperature control and efficient monitoring. This versatility makes the Thermopro thermometer a reliable tool for various cooking and environmental monitoring tasks.

Wireless Monitoring and Connectivity
ThermoPro thermometers offer wireless monitoring, enabling real-time temperature tracking from a distance. Ensure stable connectivity by synchronizing your device with the transmitter for accurate data transmission.
7.1 Setting Up Wireless Monitoring
To set up wireless monitoring, turn on your ThermoPro thermometer and ensure it is within range of the receiver. Press and hold the MODE button for 2 seconds to enter synchronization mode. Once the device is paired, you will see a confirmation on the display. Ensure both units are powered on and within the recommended range for stable connectivity. Refer to your specific model’s manual for detailed pairing instructions, as steps may vary slightly. Proper setup ensures accurate and continuous temperature monitoring, enhancing your cooking or environmental tracking experience.
7.2 Ensuring Stable Connectivity
To maintain stable connectivity, ensure your ThermoPro thermometer and receiver are within the recommended wireless range, typically up to 300 feet. Minimize physical obstructions like walls or furniture, as these can weaken the signal. Verify that both devices are powered on and properly paired. If connectivity issues arise, restart both units and re-pair them. Keep batteries fresh, as low power can disrupt communication. Avoid interference from other wireless devices operating on the same frequency. Regularly update your device’s firmware if available. For persistent issues, consult your manual or contact ThermoPro support for assistance. Stable connectivity ensures uninterrupted monitoring and accurate readings.

Troubleshooting Common Issues
Identify and resolve common issues like temperature inaccuracies or connectivity problems by checking wiring, restarting devices, and recalibrating sensors for optimal performance and reliability.
8.1 Resolving Temperature Reading Errors
Temperature reading errors can occur due to improper calibration, sensor damage, or connectivity issues. Start by recalibrating your Thermopro thermometer using the LOCK/CAL button for 5 seconds. Ensure the probe is placed correctly and avoid touching hot surfaces. If the issue persists, restart the device and check for firmware updates. Verify battery installation and replace if necessary. For wireless models, ensure stable connectivity and reduce interference. Clean the sensor with a soft cloth to remove debris. If problems remain, refer to the manual or contact Thermopro support for assistance. Regular maintenance and proper storage can prevent future inaccuracies.
8.2 Fixing Connectivity Problems
Connectivity issues with your Thermopro thermometer can often be resolved by restarting the device or re-syncing it with the receiver. Ensure the thermometer is turned on and press the MODE button to select the correct probe. Check the wireless settings to confirm the device is properly paired. If using a Bluetooth model, ensure your phone or tablet has Bluetooth enabled and is within range. Update the thermometer’s firmware if available. Interference from other devices may also cause connectivity issues, so move the thermometer away from potential sources. Replace batteries if low power is indicated. If problems persist, consult the manual or contact Thermopro support.

Maintenance and Storage Tips
Proper maintenance ensures your Thermopro thermometer remains accurate. Clean the device with a soft cloth and store it in a dry place. Avoid extreme temperatures and moisture to maintain performance. Regular care extends longevity.
9.1 Cleaning Your Thermopro Thermometer
Cleaning your Thermopro thermometer is essential for maintaining accuracy and longevity. Use a soft, dry cloth to wipe down the device, avoiding harsh chemicals. For the probe, dampen a cloth with water, but ensure it is thoroughly dry before use. Never submerge the thermometer in water or expose it to excessive moisture. Regular cleaning prevents residue buildup and ensures precise temperature readings. Proper care also involves storing the thermometer in a dry, cool place, away from direct sunlight. By following these steps, you can maintain your Thermopro thermometer’s performance and extend its lifespan effectively.
9.2 Proper Storage to Maintain Accuracy
Proper storage is crucial to maintain the accuracy and longevity of your Thermopro thermometer. Store the device in a cool, dry place, away from direct sunlight and extreme temperatures. Avoid exposing it to humidity, as this can affect internal components. Use the original packaging or a protective case to prevent physical damage. Ensure the probe is stored separately to avoid bending or damage. Before long-term storage, remove batteries to prevent corrosion. Regular cleaning before storage also ensures optimal performance. By following these guidelines, you can preserve your Thermopro thermometer’s accuracy and extend its operational life effectively.

Warranty and Customer Support
Your Thermopro thermometer is backed by a comprehensive warranty, ensuring coverage for defects and replacements. Contact customer support via phone, email, or online chat for assistance.
10.1 Understanding Your Warranty Coverage
Your Thermopro thermometer is protected by a limited warranty that covers manufacturing defects for a specified period. The warranty typically lasts for 1-2 years, depending on the model, and includes repairs or replacements for faulty components. Registering your product can often extend warranty benefits. Coverage excludes damage caused by misuse, normal wear, or improper maintenance. To claim warranty service, contact Thermopro support with proof of purchase and a detailed description of the issue. Ensure your device is used as per the manual to maintain warranty validity. Visit the official website for full terms and conditions.
10.2 How to Contact Thermopro Support
To contact Thermopro support, visit their official website and navigate to the “Contact Us” section. Fill out the contact form with your name, email, and a detailed description of your query. You can also reach them via email at support@thermopro.com or call their customer service hotline at (phone number available on the website). Live chat is another option for immediate assistance. Ensure to have your product serial number and purchase details ready for faster resolution. Support is available Monday through Friday, 9 AM to 5 PM EST. Thermopro aims to respond within 24-48 hours, providing timely solutions to your concerns.
Additional Features and Capabilities
The Thermopro thermometer offers advanced features like wireless monitoring, temperature range adjustments, and humidity tracking. It also ensures compatibility with other Thermopro devices for seamless integration and precise readings.
11.1 Temperature Range and Humidity Monitoring
The Thermopro thermometer offers a wide temperature range of -58°F to 158°F (-50°C to 70°C), ensuring accurate readings for various cooking and environmental monitoring tasks. It also features humidity monitoring, allowing users to track both indoor and outdoor conditions simultaneously. The device provides real-time updates, enabling precise control over temperature and humidity levels. With a high level of accuracy, it is ideal for BBQ, oven roasting, and other cooking techniques. Additionally, the thermometer supports temperature unit switching between Celsius and Fahrenheit, catering to diverse user preferences. This dual functionality makes it a versatile tool for both culinary and environmental applications.
11.2 Compatibility with Other Thermopro Devices
ThermoPro thermometers are designed to seamlessly integrate with other ThermoPro devices, enhancing functionality and convenience. Many models, such as the TP510 and TP19, support wireless connectivity, allowing synchronization with additional probes and monitors. This compatibility ensures comprehensive temperature monitoring across multiple devices, perfect for complex cooking setups or environmental tracking. The thermometers also work in tandem with ThermoPro apps, enabling remote monitoring and data logging. By integrating with other ThermoPro products, users can achieve a unified system for precise temperature and humidity control, making it ideal for both home and professional use. This compatibility enhances the overall user experience and versatility of the devices.
12.1 Summary of Key Points
This manual has guided you through essential aspects of your ThermoPro thermometer, from initial setup to advanced features. Key points include understanding the importance of proper calibration, synchronizing devices for wireless monitoring, and maintaining battery health. Troubleshooting common issues and regular maintenance ensure long-term accuracy. Additionally, exploring functions like humidity monitoring and compatibility with other devices enhances your experience. By following these guidelines, you can maximize the performance and longevity of your ThermoPro thermometer, ensuring precise measurements for cooking, grilling, or environmental monitoring.
12.2 Final Tips for Optimal Use
- Always calibrate your thermometer before first use for precise readings.
- Store batteries properly to extend their lifespan and avoid leakage.
- Regularly clean the probe to prevent residue buildup and ensure accuracy.
- Use the synchronization feature for seamless wireless monitoring.
- Explore all modes, such as timer and humidity monitoring, for enhanced functionality.
- Refer to the manual for troubleshooting common issues promptly.
- Keep the device away from extreme temperatures during storage.
By following these tips, you can ensure your ThermoPro thermometer performs optimally, providing accurate readings and lasting durability for all your cooking and monitoring needs.
Be First to Comment